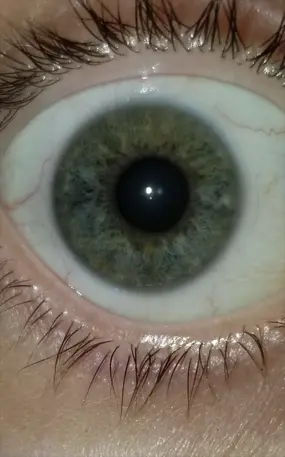
How-To: Iris Selfie
Materials
- Smart phone with camera
- Flashlight or pen light (if your camera does not have flash)
Instructions
- Go to a room with a mirror that can be dark, like your bathroom.
- Ensure that your flash is turned on.
- Set your camera’s timer to 2 or 5 seconds to ensure that you get a stable image.
- Remove glasses and/or contacts (if needed).
- Be sure to dim the lights so there is not a direct light reflection into your iris.
- Point the screen of your phone to the mirror so that you are looking at the lenses on the back of your phone.
- Zoom in on your camera until the image looks similar to the example.
- Focus on your iris (usually by tapping on your screen).
- With your free hand, gently pull your eyelids open to avoid shadows on your iris.
- Take the picture!
- Repeat the steps above on your opposite eye.
- Email your photos to [email protected].

Tips
- Have fun!
- Take several pictures if needed and pick the clearest image.
- If you need to use a flashlight or pen light, hold the light at a slight angle on the outer corner of your eye. Adjust the light towards the front or side to achieve the best results.
- Don’t forget to take pictures of both eyes!
Heal your relationship with food with an Integrative Nutrition Health Coach.
“Change your habits, change your life.” – Michelle Cardimen
If you’re interested in learning more, sign up for a free session!
Earthly Nutrition with Tabitha Story is therapeutic and complementary to medical and other alternative healthcare.
Tabitha does not diagnose or cure. Nor is Earthly Nutrition intended to replace or substitute the care of your medical provider.
© Earthly Nutrition | All Rights Reserved Worldwide | Privacy Policy | Iris Selfie | Members
Site Designed by JTab’s World![]()
